visit counter for blogspot

Im getting married--follow along with me! | Be a fan on Facebook! | Follow ThriftTrick on Instagram! | Follow ThriftTrick on Twitter! | Follow ThriftTrick on Pinterest! | Follow ThriftTrick by email! | Take Me Home! | About your gal! | Follow ThriftTrick through email! | Fashion | Thrift
Positive Body Image | On the menu... | On the turntable... | Thrift Store Reviews... | DIYs and Tips


Monday, December 12, 2011

$17.50

Things started off on a good note with this $2 Otagiri vintage owl mug. Tea time!

This cute little vintage suitcase fit my laptop perfectly! I am a sucker for vintage suitcases. I have a huge Samsonite collection. I seriously find them impossible to pass up!


There is so much great lace and monochrome going on this season, I couldn't pass up this stretchy lace top.

When I saw this yard of super vintage polyester I had a flashback to 1979. I decided I would take it to sew a dress and I saw this in my mind:

All I did was wrap it around my dress form but now you get the picture! In all reality it looks great just gathered this way. Hmm...shall I dare make my own pattern?


This was a vintage "In The Mood" suit. It came with a matching skirt for only $1.59! You might think it looks matronly but I love this. I will rock it proper.


Vintage polyster.

Nice little vintage brooch for 99 cents!

Just some cheap little chains that I intend on doing other things with...I liked them because they were both under a dollar and very long!

Laurel Burch earrings! So adorable. They caught my eye right away. I'm posting a picture of my swans (also Laurel Burch) that I bought last year for 99 cents. I just LOVE these and I've gotten many compliments on them. Check out a bunch of fantastic vintage Laurel Burch here on Ebay, if you want to drool a bit.


Cute little pearl vintage clip-ons!


Vintage Rhinestone clip ons! $3. Your cheapo gal deliberated over this; my big purchase of the day, lol...


My friend is a registered dietitian (R.D.) and bought this pin for her. How perfect, right?

All in all it was a great thrifting day! I also bought some board games and books for my son, along with a neat children's chair!

I must admit; I've been spending about thirty dollars a week thrifting in the last month. That adds up...for a family with a modest income. I don't smoke, and I don't really drink. I also don't go out to movies or spend much of anything on entertainment. Since thrifting is my main source of clothing and household items as well, I'm justifying my habit. Please...tell me what I want to hear? Hahaha!

In lieu of my guilt, I think I'll force myself to simmer for the rest of December and save my remaining pennies for Christmas. The rest of my blog entries this month will be craft and outfits. Unless...of course...there is something too good to pass up.... :D


Sunday, December 11, 2011

Brussel Sprout Couture (Hair accessories DIY) and holiday flower pins!

I always save these mesh bags from oranges, lemons and Brussel sprouts. I've seen cute things done with them before but I didn't know what I was going to use some for until it hit me last night, as I was making some homemade holiday flower pins for my hair!

Here's what I used for this project:

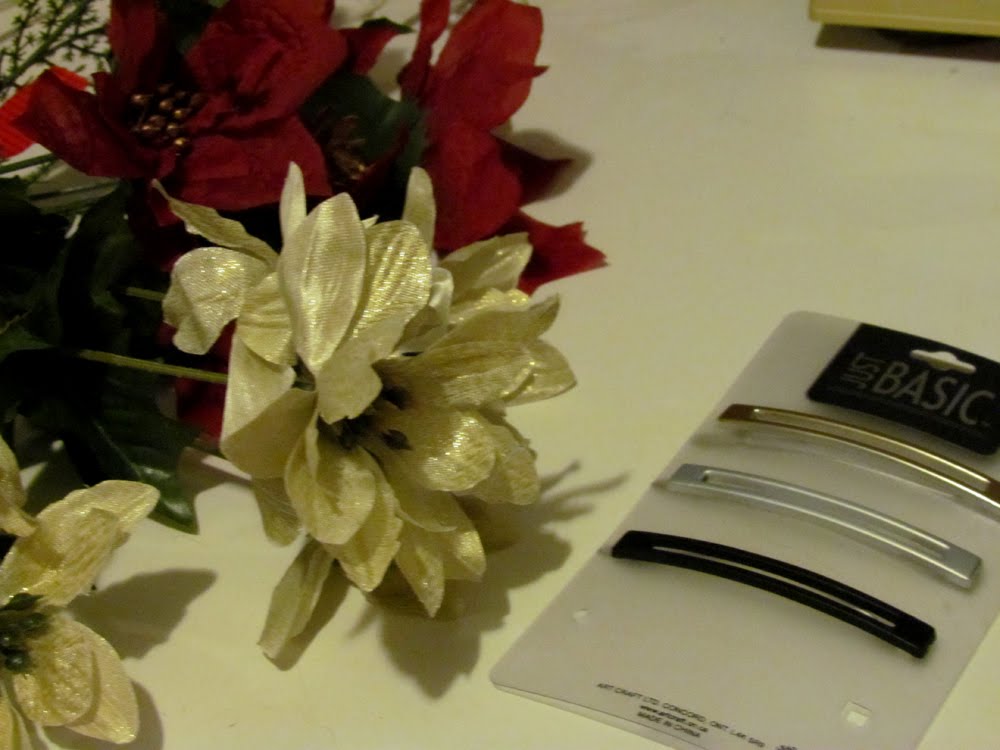
--2 batches of fake flowers from Dollar Tree ($2)
--Hot glue gun
--1 package of clip on barrettes (also from dollar tree for $1)
--Red plastic jewel from a bag of jewels called "Table scatter", also available at Dollar Tree for $1 (a whole bag of them, different sizes!)
--Scrap of old leather


As you can see, I just deconstructed the flowers from the stem, and then rearranged them back together, hot gluing the petals. After I was done, I simply put a strip of hot glue along the back. I know you've seen these done a million times and yes, they are ridiculously easy. You could use any flower, and any style clip you want. I like using the barrettes because they really stay put.


Here's where things got fun though. I've always loved the vintage veil/tulle style head peices--I have quite a few of them (here's a list of pretty ones on Esty). It occurred to me that my recycled mesh bags would be great for this. YES! So I did my own colorful and whimsical version using the petals from the flower, the mesh, one of the plastic jewels from the "scatter bag" and a scrap peice of leather--though you could use anything as your backing.


These could also be secured to a hat or glued to a headband. Oh how much fun you could have if you are the mother of a little girl...but grownups like them, too.

Have fun and if you make a tulle or flower piece, I'd love to see it on my Facebook Page!

Saturday, December 10, 2011

Brick Road


OUTFIT: Coat was my great grandmothers, it's a London Fog vintage wool. Love it sooo much. The shirt was a strange tunic type top (thrifted of course, for a few dollars), but I loved the colors and the neat collar so I had to have it. It is "Robbie Bee" brand. It was this strange length though--kind of "mumu-ish". So I hemmed it to be a shorter dress/shirt to wear with leggings or jeans, and I like it much better this way! Boots are Walmart...they have been circling around a few other entries (God, I'm cheap!) and jeans are Lee. I actually bought these at Dots for $10. The belt and the purse were both new purchases (Merona for Target) totaling about $25. The red/orange handwarmers were another Target find--clearanced for $2 at the end of the season last year! I love the brick color. Honestly, they were part of the main inspiration for this outfit!
Bracelet was a clearance "Falls Creek" item at Walmart for $3. Earrings were a thrifted for one dollar.

Makeup was fun today; I did a smoky eye with a goldish brick color, a dark brown, and a frosted sage. Lips were neutral.

Hey! I curl my hair by wrapping it around the barrel. If you like that look--wavy, not traditional curling iron curls--here's a great tutorial for you! Let me add that this year I FINALLY got a professional curling iron (thrifted ofcourse) and it changed my life. If you curl your hair often, get a super hot iron (pro or ceramic) because they rock.

Thursday, December 8, 2011

Thrifted Micheal Kors and More...


On a thrifting adventure last week I came across all of these wonderful treasures: a snakeskin leather Micheal Kors belt (one dollar!), scarf and vintage gloves from the sixties ($3 for all), another nice teal leather belt for 99 cents, a precious little carved wood white owl and a vintage ceramic owl plaque (both for $3), carved wooden angel for 99 cents, 2 old rings that I am using to make DIY statement rings with next week for 99 cents, a blue cute cocktail ring for $2, a neat long gold and pearl necklace for 99 cents, pink button clip on earrings (also vintage) and these adorable little vintage plastic dishes for .49 cents a plate and .29 cents per teacup. They have that awesome vintage plastic stamp on the back...I'd guess they are late 60's, robin's egg blue. So darling! I only bought a set of three plates, salad plates, saucers and tea cups. What a score!

Tuesday, December 6, 2011

DIY Hat and Armwarmers from a thrifted cardigan sweater!

I love fingerless gloves and armwarmers. They are so adorable and functional. Last year, my lovely friend Jenna (who pops up in my blog often) bought me some adorable Micheal Kors arm warmers in navy and grey wool. They are awesome...warm and stylish! I will have to throw them in an outfit very soon. It got me thinking about how much I love this look and then it hit me...why not upcycle a cardigan sweater to make some armwarmers and a hat? Advanced seamstresses out there might note that even AFTER chopping it up, if you do it just right...you could also get a "shrug" or cropped sweater out of the deal. SWEET! So here's what I did, following my own patterns. But naturally...as soon as I "had" the idea, I figured I couldn't be the first. I looked it up and BAM...There are lots of tutorials out there on this subject! I linked them below. I'm making two more tonight and plan on giving one away to a lucky email subscriber. :D Don't forget to subscribe and please stop by and visit on Facebook!


I chose a cardigan...because I wanted the buttons to use as an embellishment. I cut the arms off right above the elbows, hemmed them down a bit, and folded the top with elastic before hemming so that they would stretch across my upper forearms snugly. After that was done, I sewed into the handhole an inch or so on each side where my thumb would go. Now there was a thumbhole on each arm warmer! I embellished with some black and white buttons. (My instructions are drawn below).

For the hat, I cut out a double rectangle that matched the diameter of my noggin, hemmed it inside out, and then gathered and sewed the ends.

My directions! But don't worry--people who are actually GOOD at tutorials have already posted great info on how to do this.

I like to gather my hats on one side and throw a little embellishment on them. I guess that's cause I'm funky. :D


See some cute ideas here--you don't have to do long warmers, what about short rolled ones with embellishment? If you don't care about the hat...just do the gloves. Then you could always use the excess sweater material for something else.


Did I mention I only paid $1.59 for the sweater? Check out a local thrift store for an awesome selection of old sweaters to choose from!

NO-SEW TIP: Make just the armwarmers from a children's sweater. The forearm area will already fit snuggly. You can cut them and leave a frayed edge on the upper forearms and wear them as is or roll them. Just cut a small hole on the side of either arm for your thumb to pop through. Awe yeah. No-sew armwarmers.

Monday, December 5, 2011

Teal With It


OUTFIT: Vintage "Buey Too" dress. This dress was $2. It has a super light floral pattern that you can barely see until you get up close. So cute. SCARF: was another thrift find--just 99 cents. BROOCH: is vintage. My boss gave it to me and I LOVE it. Have you tried arranging a simple winter scarf this way? It goes from being a plain scarf to something so pretty and decorative. A pin or brooch keeps it in place. BELT: is a vintage belt that pops up often in my posts. Today I accidentally broke the band off the side so I put a teeny tiny black rubber band on one side to hold things into place. I don't like "tucking" the end in because it is uncomfortable for me and makes the belt twist. For this reason. I usually choose belts that are small because I know I will be belting high up on the waist. BOOTS: are from 2 years ago. I bought them at Walmart for $20. This year I re-purposed them by cutting off some braiding, moving things around, and fixing some broken things. They were a super cheap pair of boots but I made them last two seasons! They will be around next year but I'll likely retire them. A good pair of brown leather boots will be something I will have as a bigger purchase next year. BAG: Vintage Samsonite. I am a sucker for it and collect them. I can't help it. I have this same bag in fire engine red! It's just so cute. GLASSES: 99 cents, Dollar Tree. BRACELETS: The teal bracelet was from the dollar store--a funky independent one I frequent near my house. The awesome chain mail bracelet was hand made for me by my jewelry making friend, Penny! Check out her beautiful stuff at her Etsy store, Firewater Jewelry!

Popular Posts