visit counter for blogspot

Im getting married--follow along with me! | Be a fan on Facebook! | Follow ThriftTrick on Instagram! | Follow ThriftTrick on Twitter! | Follow ThriftTrick on Pinterest! | Follow ThriftTrick by email! | Take Me Home! | About your gal! | Follow ThriftTrick through email! | Fashion | Thrift
Positive Body Image | On the menu... | On the turntable... | Thrift Store Reviews... | DIYs and Tips


Showing posts with label nail polish. Show all posts

Monday, August 5, 2013

Gold, Green and Black Caviar Mani


manilogo


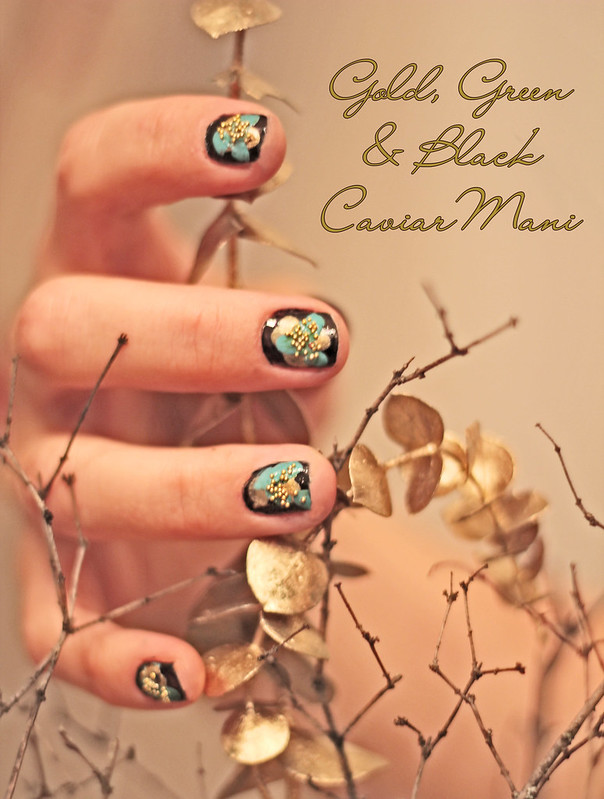
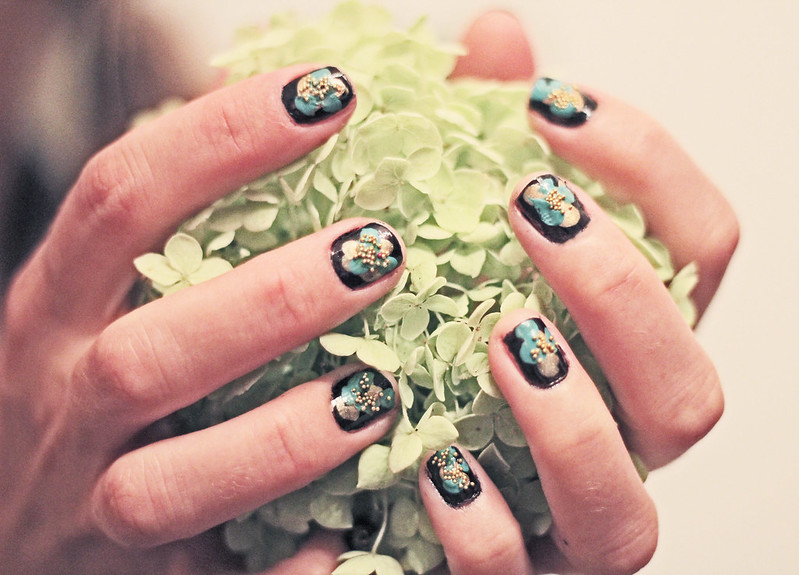
GOLD, GREEN AND BLACK CAVIAR MANI

I'm certainly no nail art master, and often times, my nail painting is lazy at best--defined by a few messy coats with not enough drying time in between! I often peruse the internet though, coveting fancy and flawlessly painted nails at some of my favorite DIY sites, including "Fuck Yeah Nail Art" ('scuse the language, m'aam), Katrina's Nail Blog, Miss LadyFinger and also "Nailed It".

IF you are misled by the idea that you can't have pretty nails because you can't afford expensive polish, than by all means, allow me to dispel that myth with one of my very few-and-far-between nail art features!

The reason why I am posting this is to show what can be done with inexpensive items! 

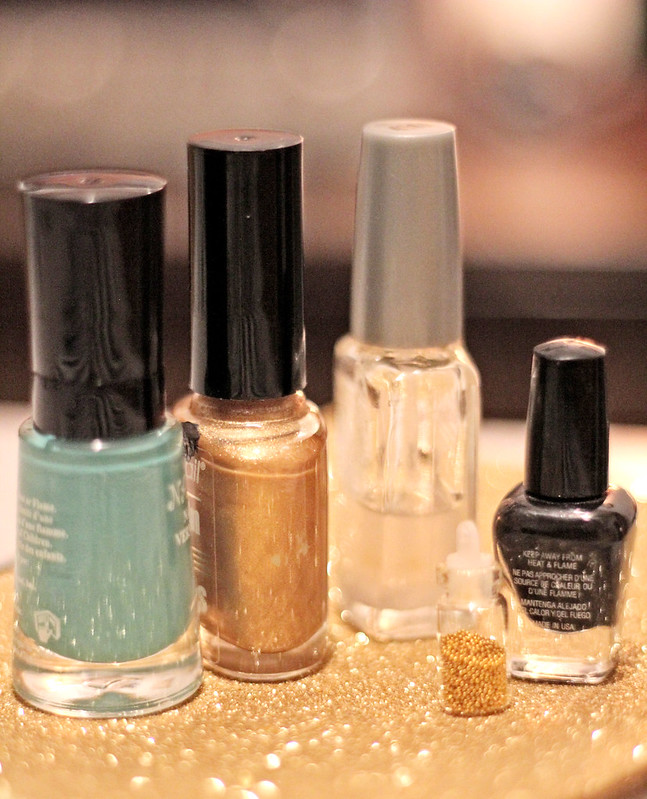
What I used on my nails:  

-Base coat of black Sally Girl mini nail polish (under one dollar).

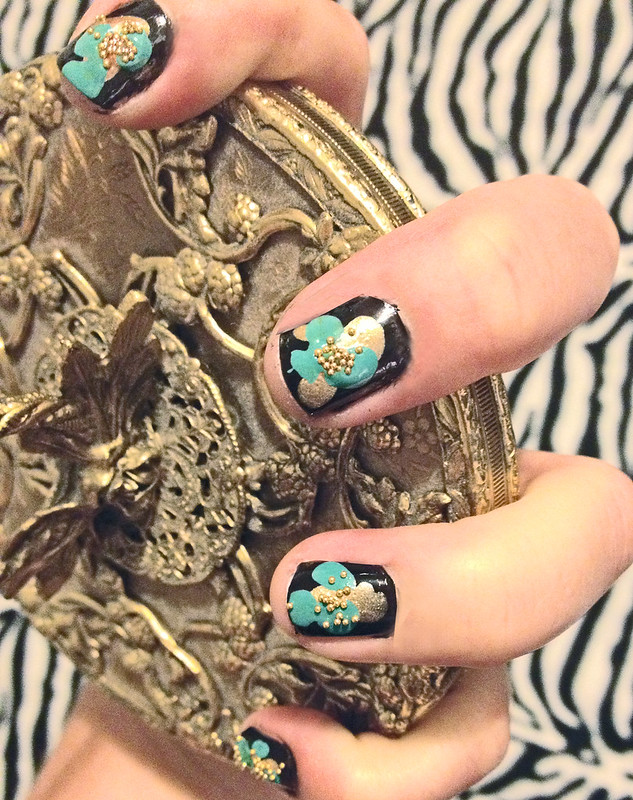
-"Globs" (technical terms only, here, please) of both Nail Pops in mint green and Nutra Nail in gold. Purchased on clearance, collectively, for $3.

-Wet n' Wild Clear Coat, purchased for one dollar.

-Donna Michelle caviar Nail art "mini bottles"--for one dollar at Dollar Tree, I purchased one pack, which contained about eight mini pots of micro steel balls in different colors, and gold was amongst them! 

IMG_9321

Basically, I just put one coat of black on my nails (I even did my toes to match!), allowed it to dry, and then sort of "globbed" on both the gold and mint green. Before those layers were totally dry, I took my clear brush, dipped it into a pile of the caviar beads, and "pressed" them into little clumps in the middle of my nails. Once that top layer was dry, I followed up with a layer of clear to finish.

IMG_9295

IMG_9286

IMG_6829

IMG_6826

IMG_6824

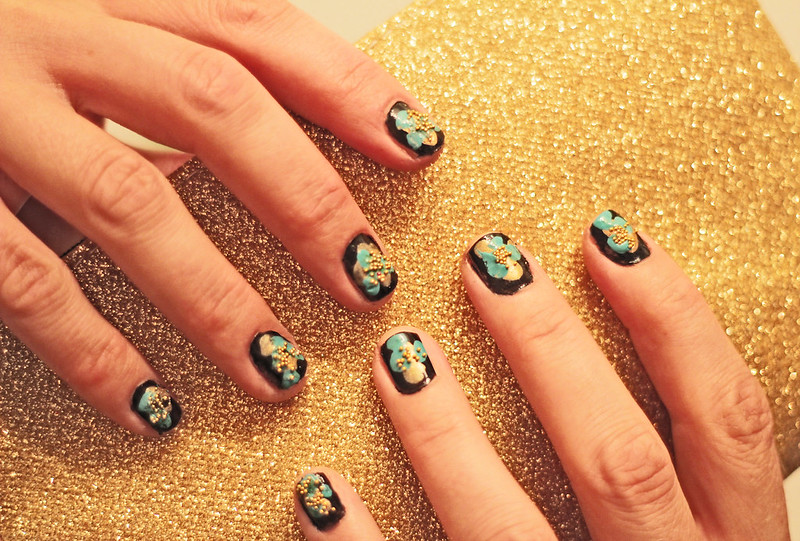
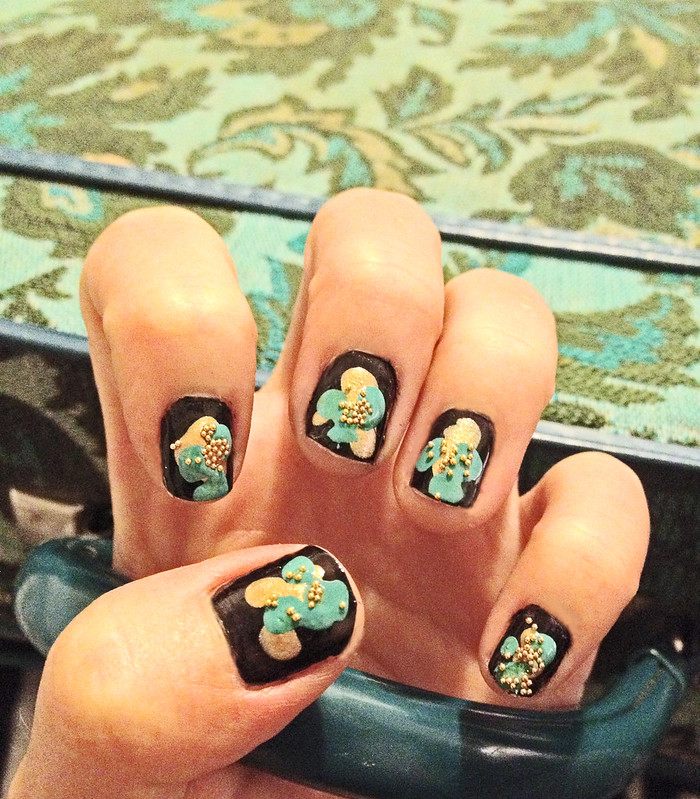
What I like about this mani: It's very forgiving, which is good for people who are extremely "un-precise", as I am. Also, if you are not the best at waiting for the layers to dry, smudge marks are hidden amongst the globs and beads quite well. Not that--ahem--I would know anything about that.

Go ahead, get your fancy mani on, for around six dollars!

Thursday, September 20, 2012

Nail Polish Cabinet DIY...and dressing room makeover!


Nail Polish Cabinet DIY, and Dressing Room Makeover!

Let me start at the very beginning  (a very good place to start) :)

When we first moved into our home, ten years ago, there were three bedrooms. One of them was quite small and had a large closet, one of them was medium sized with a smaller closet, and the largest room of all...had no closet.
Being that we desired more room, we chose the largest bedroom of the three to be our master bedroom. The second larger room became an exercise room, and when our son came along, his bedroom!  The third was originally our office, but ended up storing not only the exercise equipment once our son came along, but also, holiday decorations and the beautiful red dishes I inherited from my mother five years ago.

Given my obsession with vintage dresses and clothes/accessories in GENERAL, you can imagine what happened to our bedroom.  Rolling garment racks, stacked boxes and baskets overtook a corner of our room that became my exposed "closet" (if you could call it that.)  Even my dress form and hat collection lived in there, and the room was so effervescently girly that my man could barely stand being in the room for more than a couple moments...let alone relaxing or sleeping in the clutter. Not good.

Fast forward to this year: in a passing conversation, the hubby said to me, "Why don't you just make that entire small bedroom a huge walk in closet?"

Rainbows appeared, chimes rang from heaven and somewhere, a unicorn whinnied.

And that's just what I did.

My agenda was to move everything--clothes, scarves, hats, shoes, bags, accessories, makeup, etc.--into the side room, along with my style pinboard and even nail care items. Fast forward to my adorable find from Goodwill!


The Vintage Spice Rack
(Turned nail polish cabinet)


What a great idea, right? I love the way it looks...quite hidden, really, amongst my other vintage treasures on the wall! I bought this spice rack for $4.00 at Goodwill.


It's a touch cluttered already, but I don't mind. The space is working quite well for me! I may purchase a bigger mirror, but other than that...I adore this room! I even had the space for a papasan chair next to my closet..so I can sit, drink Earl Grey, and read my fashion mags!


My silly little ice cube trays (from my DIY post "Cool Little Organizer DIY"). They aren't the most beautiful things ever, but they work so amazingly well to store my earrings!


Original magazine clips from one of my most amazing and favorite thrift finds ever; two huge scrapbooks that a teen girl made ranging from the late 1940's-1960s.  OH HEY Judy Garland, aren't you fabulous? From her red nails and lips to the royal blue shirt dress and black sequin tie...I'd wear this look in a heartbeat and I find it so inspiring.  I also pin modern fashion to my board all the time, but it just happens to be 100% authentic vintage prints right now.


My shoes are all stored in three racks; two vertical and one on top horizontally. A garment rag with shower curtain rings stores multiple hand bags on each ring with a few displayed on top.  My hats are above, as show below:


Yep, every inch of this spare bedroom is being used--there is another floor lamp, ironing table, linen sprays, an ipod dock, perfumes and my dress form as well!


It's not perfect (and ideally, I'd have some fun color on the wall) but it's still a work in progress. To be honest, though, it's the only time in my life I've ever had a space completely dedicated to being 100% girly. I just want to LIVE in this little gal cave. 

I just might.

Saturday, January 14, 2012

Red and Glitter Mani

Maybelline New York Express Finish 60 Second Nail Color, Racing Rubies 190

LA Colors silver chunk glitter

Wet and Wild Shine Top Coat


I'm not the most precise painter (as evidenced by high res photos) but I AM getting a lot more creative and adept with my nails as I do it more often. For years as a musician I avoided polish, because I always wore it off playing my electric guitar. As I transitioned into playing classical more often, the nylon strings were much kinder to my manicures! Also, the glitter manis are so very kind to those who aren't as precise or may be rough on their paint jobs. The chunk glitter hides so many imperfections and it's tough!

One thing I've found is that I really appreciate having my nails cut in a "square-ish" shape and to a uniform length. I use to try and "grow out" each nail to its potential, rather than trimming them all the same regardless. Why I did this, I'm not exactly sure (am I weird?). However, my manicures really do look so much nicer when I aim for a homogeneous length.

If you are a regular reader of my blog, then you KNOW I am cheap. I do not pay for manicures--I've been giving them to myself and others my entire life! I know some people incorporate professional manis and pedis into their routines as a method of self-pampering and if that is your thing--more power to you!

However, if you are like me and you can't afford to do that regularly and/or can't justify spending $30 (or more depending on what you have done) on something fairly short lived, then try these "pro" tips I use regularly:

-Soak your hands in warm water with essential oils and soap to soften, and follow up with moisturizers. You could also achieve this by folding hands into a steamy, hot towel and letting them soften up that way.

-Less is more. Over three coats of nail paint and you could be heading for trouble and smudges!

-Roll the polish in your hands to warm and mix. Shaking creates air bubbles in the polish.


WEB RESOURCES


Popular Posts